Where it all Began - Richard Sweeney Workshop 1
Today i attended a workshop which was run by Richard Sweeney, a well known designer famous for manipulating paper into design pieces which soon progressed into becoming sculptures in their own right. He combines disciplines of design, photography, craft and sculpture, which in my opinion are very beautiful and intriguing to look at due to their wonderful forms and the fact that they are made simply out of paper is rather amazing.
Today i attended a workshop which was run by Richard Sweeney, a well known designer famous for manipulating paper into design pieces which soon progressed into becoming sculptures in their own right. He combines disciplines of design, photography, craft and sculpture, which in my opinion are very beautiful and intriguing to look at due to their wonderful forms and the fact that they are made simply out of paper is rather amazing.
Here are a few examples of Richards work which i found inspiring:


I find these pieces most inspiring because of the forms and shapes they resemble. All of these pieces look like a natural form whether it may be flowers, shells, rocks or DNA. It is evident that Richard has used symmetry and 'repeat' in these pieces.


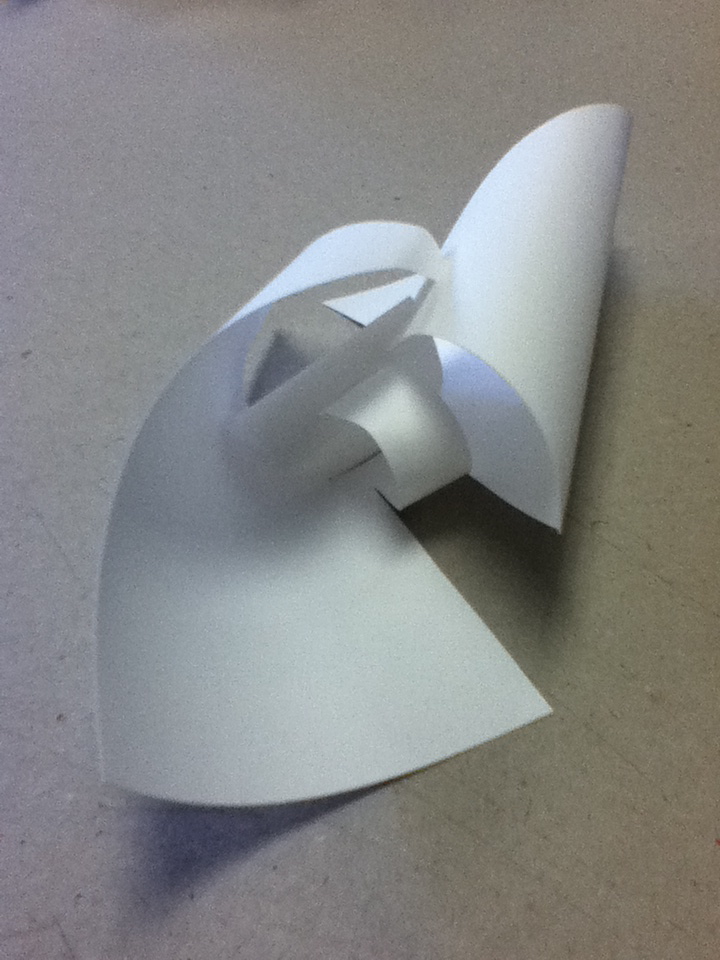
In the first workshop with Richard he taught us the basic techniques of what can be produced using paper. He set the rules of not being allowed to attach pieces together, use a different sized piece other than A5 or use glue or any other sticking material. As well as these rules he wanted us to consider 'repeat' throughout our work. This would be a big part throughout all of the project.
Here are some of my first attempts during this workshop, following Richards rules:

I used many slits to attach parts together because of the rules which were set by Richard.


I experimented with simple scores and bending in this piece just to see what could be produced, this was one of the first pieces i produced during this workshop.

This piece was produced very quickly and simply but the sculpture produced is quite attractive. It almost forms a tunnel shape.
Workshop 2
In this workshop we carried on with the techniques we were shown by Richard from the first session with him. He also showed us another technique to try out which was 'pleating' but still carrying on the theme of repetition. I found this workshop the most challenging because of the 'tricky' elements which were involved. Here are some examples of the work i produced:


Workshop 3
In this workshop it was time to bring all of the techniques i have learnt so far together, but especially repetition. Richard showed us how to cut out smaller shapes to put together to make another shape. We focused on modular shapes for this. He also advised us that we could us both 'negative' and 'positive' parts to create something new (for example, using the paper net which the shapes have been cut out of). He taught us how to put tabs on the shapes so that they can be attached together. Attaching pieces together in this way allows little room for experimentation once they are attached. Therefore experimenting is limited and it is mainly left down to imagination while attaching pieces together. Here are some of the sculptures i produced.


In this workshop we carried on with the techniques we were shown by Richard from the first session with him. He also showed us another technique to try out which was 'pleating' but still carrying on the theme of repetition. I found this workshop the most challenging because of the 'tricky' elements which were involved. Here are some examples of the work i produced:

As you can see, the 'points' are very sharp and precise in these pieces, this is why the pattern looks so dominant and effective.

The pattern formed is very interesting, who would have thought such a 'deep' and attractive pattern could be made simply out of paper?

I then tried creating a 'hanging sculpture' I cut slits into the paper, doing two slits and alternating sides. This was repeated until all of the piece of paper was used, i then simply held it from the top and it formed a strange hanging object which is shown below.

Here is the outcome when held up from one end.

As you can see from the above images i tried out the pleating technique which Richard taught us. I found it rather tricky to do but the outcome was successful in the end. However, i don't think it is something i will carry forward for either my paper sculpture or poster design. I then tried repeating slits in the paper doing two slits alternatively to see what was produced when it was held up.
In this workshop it was time to bring all of the techniques i have learnt so far together, but especially repetition. Richard showed us how to cut out smaller shapes to put together to make another shape. We focused on modular shapes for this. He also advised us that we could us both 'negative' and 'positive' parts to create something new (for example, using the paper net which the shapes have been cut out of). He taught us how to put tabs on the shapes so that they can be attached together. Attaching pieces together in this way allows little room for experimentation once they are attached. Therefore experimenting is limited and it is mainly left down to imagination while attaching pieces together. Here are some of the sculptures i produced.

As you can guess, the next image is produced simply from the 'negative' left overs from the first piece. Personally i think the 'negative' pieces are more attractive because they look more adventurous, instead of a simple repeated event.

I bent the paper in different ways to get the most potential out of it. All sorts of 'images' were created by doing this.


As you can see from my attempts above, i have used both of the negative and positive parts of the paper cut outs to form paper sculptures. From these outcomes i prefer the 'negative' parts which is the left over paper of which the repeat modular shape has been cut out from.